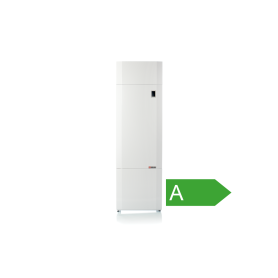
Nilan comfort 300 manual og opsætning af aggregat
Do-it-yourself installation of the Nilan Comfort 300 unit does not have to be difficult. On this page, we have collected a few tips and tricks that you will not necessarily find in the manual.
Before you start installing your Nilan Comfort 300 unit, we naturally recommend that you read the manual thoroughly. A manual is included with the unit itself, but you can also find the complete manuals for the Nilan Comfort 300 here:
| Nilan Comfort CT 300 manual | Nilan Comfort 300 LR manual: |
Tips and tricks for do-it-yourself Nilan Comfort 300 installation
Find yourself a do-it-yourself helper
Many do-it-yourself tasks are more fun when you don't do it all by yourself. This is one such task. The Nilan Comfort 300 unit weighs around 45 kg, and it is difficult to handle by one man (m/f). It is therefore a good idea to have 2 people to get the unit into place - especially when it is in an attic or other places where space and/or accessibility may be a problem.
Make a good platform for the unit
If you install your Nilan Comfort 300 unit on the ceiling, make sure you make a good platform for the unit. You can, for example, build it in plywood.
Place your Nilan Comfort 300 unit carefully
In relation to the location of the unit, it is also important that you take into account that you must be able to service it. In addition, you must ensure that the outlet for the condensation drain on your Nilan Comfort 300 is located so that it is easy to connect a water trap.
Remember vibration dampers
Remember to get 4 pcs. green vibration dampers under the unit so that vibrations are not transmitted through the construction.
And what about an extension cord?
The cable for the unit is only 1.5 metres, so if the control is to be placed further away than this, you must remember to purchase an extension cable.
Start with the mufflers
Once your Nilan Comfort 300 unit is properly positioned and accessible, you should put the silencers on immediately and double check that they are firmly in place before you start your pipe installation.
Installation guide continued – for piping in the ceiling
- Before starting the piping, you can advantageously drill all the holes in the ceiling or wall. You then set up a blunt pipe, which is fixed to the formwork with a pipe holder. This gives a good overview when you are in the attic.
- Now you can run the two main lines out through the house and reduce the pipe size where indicated on the drawing.
- After this, you can make the connectors that must go out to each piece of pipe/valve. Of course, if you don't use spigots, add tees in the right places on the main line.
- Now you can mount a string to each piece of pipe/valve. Remember to place the "conversation silencer" as close to the valve as possible. The location can be both horizontal and vertical.
- Return and intake can be led out to grates or roof hoods. Roof hoods are often insulated, and in that case you do not need a silencer on the Nilan Comfort 300 unit. If, on the other hand, you use gratings in the gable, we always recommend soundproofing so that you avoid external noise.
- Pipes are led up to grates or roof caps. Standard GRY grates can be screwed into the frame.
- When the valves are to be set up, you remove the frame and set it up in the pipe. 2 pieces are screwed. self-tapping vent screws into each side at the top of the frame so the vent can still be turned up into the frame. Important! Remember that the frame must always be level with the underside of the ceiling, so that it can be screwed up really tight.
- Plumbers install condensate drains. Some things you must not do yourself, even if it can be tempting and you just know how to do it.
Starting up your Nilan Comfort 300 unit
Now all you have to do is start up the unit and adjust the valves so that you get the optimal operation out of your new ventilation solution.
Have fun with the project.
Buy a complete ventilation package and get it all
If you have the courage to do it yourself, we offer some complete do-it-yourself packages that contain ready-made solutions for ventilation with Nilan Comfort 300 at home. We can also create a 100% customized solution for your home and your needs.
See our complete ventilation packages here.
We draw and tell
You can use our complete ventilation solutions for villas in connection with both new construction and renovation. In both cases, we are happy to prepare a sketch based on the layout of the villa where the ventilation solution is to be installed. The drawing is a guideline to ensure that you get the right amount of air into the rooms in question.
Del dette indhold
Relaterede produkter
Komplet Nilan Comfort CT 350 ventilationspakke 200 kvm indblæsning til højre

Komplet Nilan Comfort 300LR ventilationspakke 200 kvm

Nilan Comfort 300LR ventilationsanlæg med varmegenvinding med HMI styring

Relaterede indlæg


